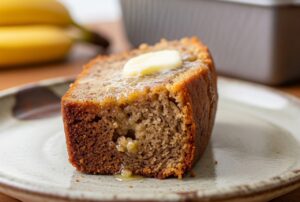
So, you’re craving soup but secretly wish the bowl could be edible too? Enter: sourdough bread bowls. They’re cozy, rustic, and let’s be real—half the fun of eating soup in a bread bowl is tearing into the bowl itself. I’ve made these a few times now, and trust me, once you pull them fresh out of the oven, you’ll feel like you belong in a bakery. Ready to give it a shot? Let’s talk about how to whip up the perfect sourdough bread bowls without losing your sanity.
Why Sourdough Bread Bowls Are Totally Worth It
Ever had soup in a regular ceramic bowl and thought, “Yeah, this is fine”? Exactly. Now imagine that same soup sitting inside a crusty sourdough shell that you can rip apart as you go. That’s food and fun all in one bite. Plus, sourdough has that tangy flavor that makes every bite way more exciting than plain white bread.
And let’s not forget, bread bowls instantly make you look like you have your life together. Serve soup in a bread bowl at a dinner party and watch your guests lose their minds. Pro tip: they’re also a sneaky way to skip washing extra dishes.
What You’ll Need for This Recipe

Let’s break it down. Nothing fancy here—just pantry basics, a little patience, and your beloved sourdough starter.
Ingredients:
- 500g bread flour (strong white flour works best)
- 100g active sourdough starter (bubbly and happy)
- 10g salt
- 300g warm water
- Extra flour for dusting
That’s it. Four ingredients. Wild, right? You’ll wonder why you ever paid $7 for one bread bowl at a café.
Tools you’ll want nearby:
- Mixing bowl
- Dough scraper (optional but makes life easier)
- Dutch oven or baking stone
- Parchment paper
- Sharp knife or lame for scoring
Step-by-Step Guide to Making Sourdough Bread Bowls
Step 1: Mix and Rest
Grab your mixing bowl, toss in the flour, starter, and water. Mix until it’s a shaggy mess. Don’t panic if it looks rough—it’s supposed to. Cover and let it sit for 30 minutes. This rest (called autolyse if you want to sound fancy) gives the flour time to hydrate.
Step 2: Add Salt and Knead Gently
Sprinkle in the salt. Use your hands to squish everything together. At this stage, the dough will be sticky. That’s okay—sticky dough = good bread later. I usually stretch and fold the dough instead of traditional kneading because my arms aren’t training for the Olympics. Every 30 minutes, stretch one side of the dough up and fold it over. Do this 3–4 times.
Step 3: Bulk Fermentation
Let the dough rise for about 4–6 hours at room temp, depending on how warm your kitchen is. You want it to double in size and look airy. Pro tip: If your dough is barely moving, your starter might not be active enough. Don’t shoot the messenger, but you may need to feed it and try again.
Step 4: Shape into Bowls
Once your dough is ready, divide it into 4–6 equal pieces. Shape each into a tight ball. Place them on parchment paper, cover lightly, and let them rest for 30 minutes.
Then, reshape the dough balls to make sure they’re nice and tight. Place them seam-side down in a proofing basket (or just a floured bowl if you’re winging it).
Step 5: Final Rise
Let the shaped dough rest for another 1–2 hours, or stick it in the fridge overnight if you want more sour tang. I usually go overnight because, IMO, it gives a way better flavor.
Step 6: Bake Like a Boss
Preheat your oven to 475°F (245°C) with your Dutch oven inside. Carefully place one dough ball onto parchment, score the top with a sharp knife, then drop it into the hot Dutch oven. Bake covered for 20 minutes, then uncovered for another 20–25 minutes until it’s golden brown.
Repeat for the other bowls, or bake multiple at once if you’re using a baking stone.
Step 7: Hollow Them Out
Once the bread cools slightly (don’t rush this or you’ll burn your fingers—been there), slice off the top and gently scoop out the inside. Congrats, you’ve got yourself a sourdough bread bowl. Now just fill it with your favorite soup, stew, or even chili.
Tips for Success
- Use strong flour. Bread flour gives the best structure. All-purpose will work, but your bowls may sag like a sad balloon.
- Starter matters. Make sure your sourdough starter is active, bubbly, and smells pleasant. If it smells like gym socks, feed it and try again.
- Size counts. Keep your bread bowls smallish. If you make them too big, they’ll swallow your soup like a black hole.
- Don’t toss the insides. The fluffy bread you scoop out? Save it for croutons, breadcrumbs, or just eat it with butter while you wait. 🙂
What to Serve in Sourdough Bread Bowls
Here’s where the fun begins. You can stuff these bowls with practically anything.
- Classic soups: Tomato basil, clam chowder, broccoli cheddar. You know, the usual suspects.
- Hearty stews: Beef stew, chicken and vegetable, or lentil stew if you’re feeling healthy-ish.
- Chili: Thick, spicy chili inside a sourdough bowl? Game over.
- Creative fillings: Mac and cheese, spinach dip, or even a thick curry. Who’s gonna stop you?
Seriously, once you nail the bread bowl, the fillings are endless.

Why Homemade Beats Store-Bought
Could you buy bread bowls at the store? Sure. But they’ll never match the fresh, tangy flavor of homemade sourdough. Plus, making your own means you control the size, texture, and flavor. Want them smaller for appetizers? Easy. Want them bigger so your soup looks like it’s swimming in bread? Go for it.
And honestly, making bread bowls is just fun. There’s something super satisfying about serving food in something you baked from scratch. Feels a little primal, right?
Troubleshooting Common Bread Bowl Problems
- My bowls collapsed. Probably over-proofed. Next time, shorten the final rise.
- The crust is too hard. Try lowering your bake time slightly or add a pan of water in the oven for extra steam.
- The inside is gummy. That means it’s underbaked. Stick it back in the oven for 5–10 minutes.
- They don’t taste sour enough. Leave the dough in the fridge overnight for more tang.
See? Easy fixes. Don’t panic if your first attempt isn’t Instagram-worthy. Bread baking is basically a series of experiments anyway.
Making It a Habit
Here’s the thing: once you’ve made sourdough bread bowls once or twice, you’ll start looking for excuses to make them again. Got leftover stew? Bread bowl. Want to impress a date? Bread bowl. Need to feel like you actually accomplished something today? Yep—bread bowl.
And if you’re someone who already bakes sourdough regularly, this is just another way to show off your starter’s potential. Instead of the usual boules or loaves, you get a fun, edible serving dish. Win-win.
Final Thoughts
Sourdough bread bowls aren’t just about holding soup—they’re about creating a meal that’s comforting, a little quirky, and totally satisfying. With just a few ingredients and some patience, you can bake bowls that wow your friends, family, or even just yourself on a cozy night in.
So go ahead, fire up your oven and let your sourdough starter do its magic. And when you’re sitting there tearing into a warm, tangy bread bowl filled with cheesy broccoli soup, you’ll know exactly why this recipe is worth it.
Now tell me—what’s the first thing you’re going to fill your bread bowl with? Because IMO, chili is the ultimate choice. 😉